> ## Documentation Index
> Fetch the complete documentation index at: https://docs.trainy.ai/llms.txt
> Use this file to discover all available pages before exploring further.
# Images
> Log and view image data in Pluto
## Logging
Image logging supports the following formats:
* [Numpy](https://numpy.org/doc/stable/reference/arrays.html) arrays
* [PIL/Pillow](https://pillow.readthedocs.io/en/stable/reference/Image.html) images
* [PyTorch](https://pytorch.org/docs/stable/tensors.html) tensors
* [Matplotlib](https://matplotlib.org/stable/api/figure_api.html) plots or figures
To log an image, instantiate the `pluto.Image` class.
```python theme={null}
img = pluto.Image(
data: Union[str, PILImage.Image, matplotlib.figure.Figure, torch.Tensor, np.ndarray],
caption: str | None = None,
)
pluto.log({"image/file/0-0": img}, step=step)
```
| Parameter | Type | Description |
| --------- | -------------------------------------------------------------------------------- | ---------------------------------------------------------------------------------------------------------------------------- |
| `data` | `Union[str, PILImage.Image, matplotlib.figure.Figure, torch.Tensor, np.ndarray]` | The image data to log. Can be a path to an image file, a PIL image, a Matplotlib figure, a PyTorch tensor, or a NumPy array. |
| `caption` | `str` | A caption for the image. |
## Viewing
Logged images appear as gallery cards, grouped by their metric label prefix. When comparing multiple runs, images from each run are shown side-by-side.
When multiple runs are selected in the Compare view, images logged with the same metric label are displayed together, with each run's image labeled with the run name and ID. This makes it easy to visually compare outputs across experiments.
### Adding to a dashboard
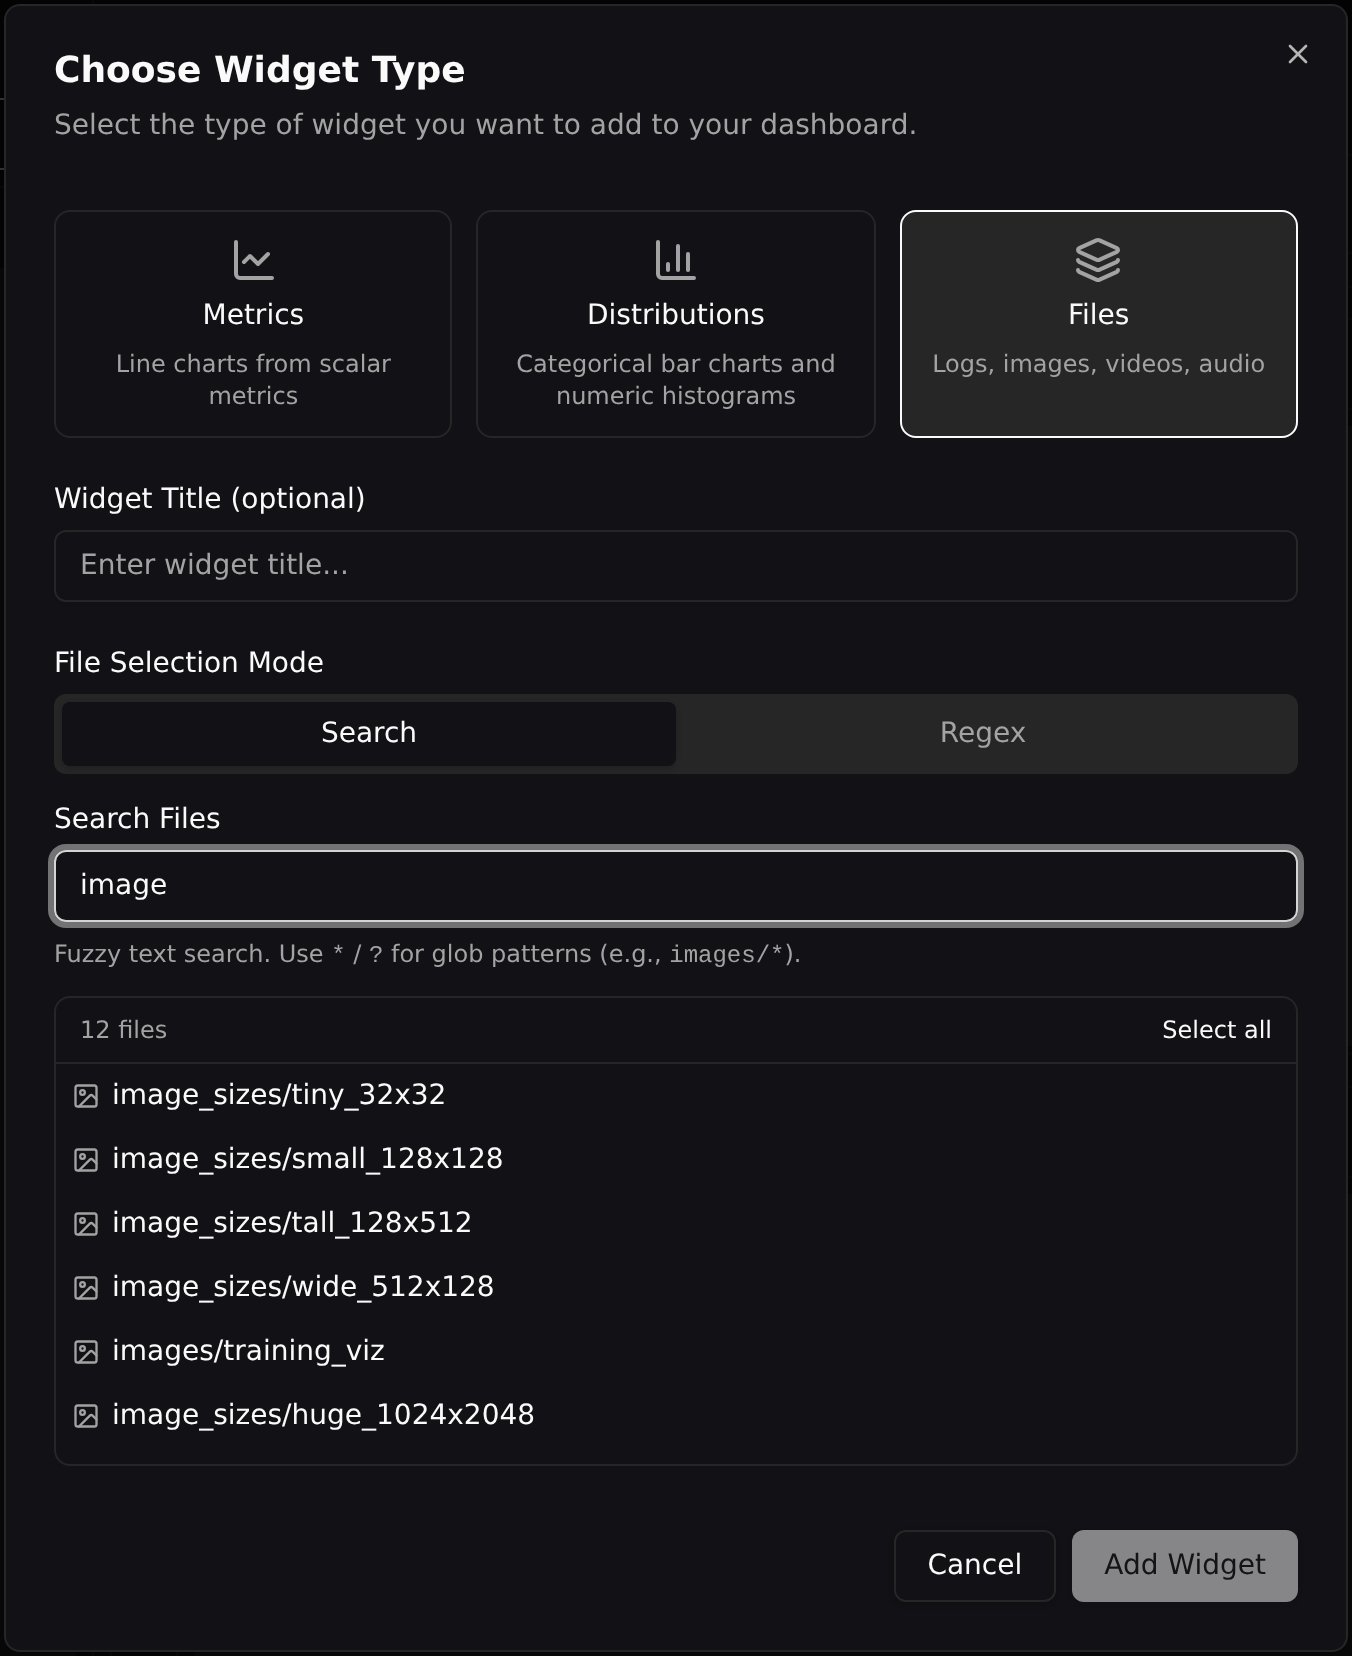
Images show up automatically in the Compare view. To place an image gallery on a [custom dashboard](/pluto/dashboards), open **Add Widget**, choose the **Files** tab, and search for your image log name.
 ### Step Navigation
If you log images at multiple training steps, use the step slider below the images to browse through different steps. This is useful for tracking how generated outputs (e.g., sample images, attention maps) evolve over the course of training.
When multiple image groups are displayed in the same section, their step sliders can be **linked** so that changing the step on one group changes all of them simultaneously. Click the **lock icon** on the step navigator to toggle sync on or off.
### Multi-Sample Logging
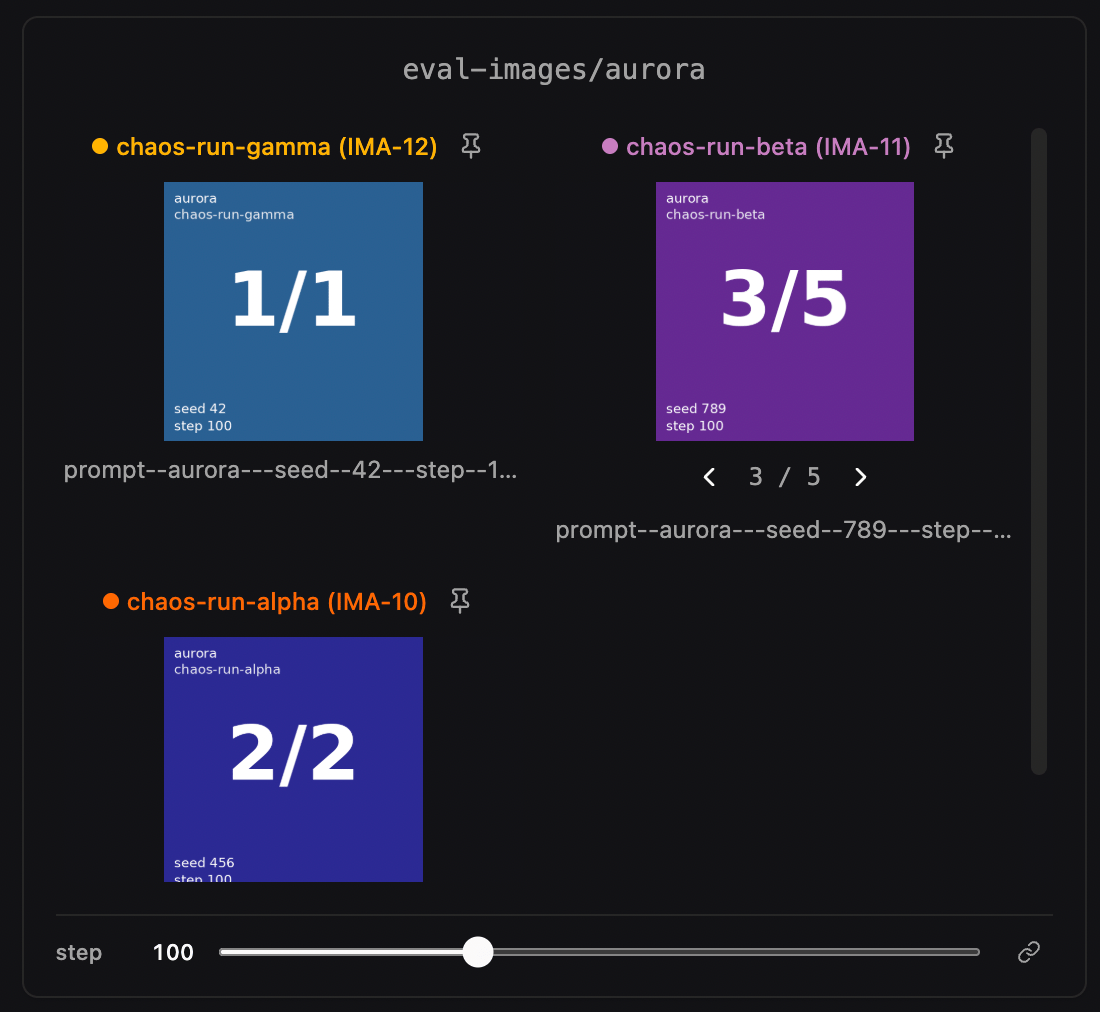
Log **several images at the same step under one log name** by passing a list. Every sample renders inside the same card with a per-cell `◀ i / N ▶` nav row above the image:
```python theme={null}
pluto.log({
"gens": [pluto.Image(a), pluto.Image(b), pluto.Image(c)],
}, step=10)
```
### Step Navigation
If you log images at multiple training steps, use the step slider below the images to browse through different steps. This is useful for tracking how generated outputs (e.g., sample images, attention maps) evolve over the course of training.
When multiple image groups are displayed in the same section, their step sliders can be **linked** so that changing the step on one group changes all of them simultaneously. Click the **lock icon** on the step navigator to toggle sync on or off.
### Multi-Sample Logging
Log **several images at the same step under one log name** by passing a list. Every sample renders inside the same card with a per-cell `◀ i / N ▶` nav row above the image:
```python theme={null}
pluto.log({
"gens": [pluto.Image(a), pluto.Image(b), pluto.Image(c)],
}, step=10)
```
 #### Sync Sample Indices
A **Sync Sample Indices** selector in the media settings popover controls how the sample index is shared:
* **Off** — each run steps through its samples independently.
* **Across runs** — every run in the same widget shares the sample index.
* **Across widgets** (default) — every run on every media widget (image, video, and audio) advances the sample index in tandem.
The selector is always available, so you can opt a single widget out of cross-widget sync. Where a cell has fewer samples than the shared index, it clamps to its own last sample, and single-sample cells show no nav row.
### Pinning Runs at a Step
The global step slider forces every run to be viewed at the same step, which makes it hard to compare runs at their respective best-performing checkpoints — different runs converge at different steps, and the artifacts you actually want side-by-side don't all live at the same `step`.
Pinning solves this by letting you freeze individual runs at a specific step while the global slider keeps driving everything else. Common workflows:
* Lock a baseline run at its best step, then sweep the slider on the rest to see how the variants compare against that fixed reference.
* Pin every run on the page at its own argmin/argmax of a metric so the gallery shows each run's best checkpoint regardless of when it landed (see [Best-Step Pinning](#best-step-pinning) below).
* Hold a run frozen at a known-bad step to inspect failure modes while other runs continue advancing.
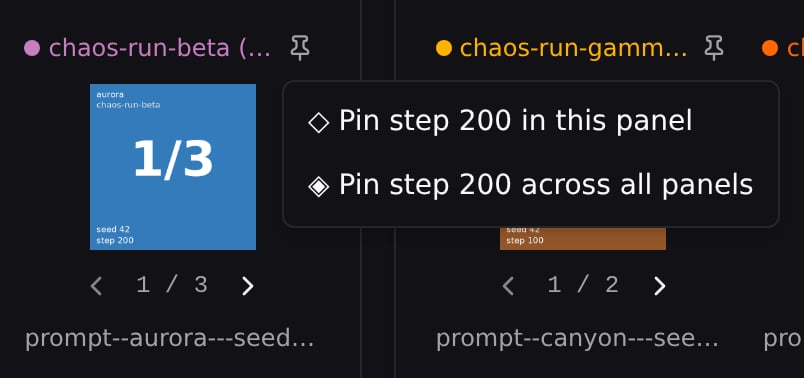
Each pinned card shows a colored badge with the pinned step. Click the pin button on an image card to choose the pin scope:
| Symbol | Scope | Effect |
| ------ | ------------------------- | ---------------------------------------------------------------------------------------------------------------------- |
| ◇ | **Pin in this panel** | Freezes only this card's run inside this image widget. Other widgets for the same run still follow the global stepper. |
| ◈ | **Pin across all panels** | Freezes this run at the chosen step in every image widget on the page that shows it. |
| ★ | **Pin to best step** | Pinned by a column-header action (see below). The step is computed per run from a metric's argmin/argmax. |
#### Sync Sample Indices
A **Sync Sample Indices** selector in the media settings popover controls how the sample index is shared:
* **Off** — each run steps through its samples independently.
* **Across runs** — every run in the same widget shares the sample index.
* **Across widgets** (default) — every run on every media widget (image, video, and audio) advances the sample index in tandem.
The selector is always available, so you can opt a single widget out of cross-widget sync. Where a cell has fewer samples than the shared index, it clamps to its own last sample, and single-sample cells show no nav row.
### Pinning Runs at a Step
The global step slider forces every run to be viewed at the same step, which makes it hard to compare runs at their respective best-performing checkpoints — different runs converge at different steps, and the artifacts you actually want side-by-side don't all live at the same `step`.
Pinning solves this by letting you freeze individual runs at a specific step while the global slider keeps driving everything else. Common workflows:
* Lock a baseline run at its best step, then sweep the slider on the rest to see how the variants compare against that fixed reference.
* Pin every run on the page at its own argmin/argmax of a metric so the gallery shows each run's best checkpoint regardless of when it landed (see [Best-Step Pinning](#best-step-pinning) below).
* Hold a run frozen at a known-bad step to inspect failure modes while other runs continue advancing.
Each pinned card shows a colored badge with the pinned step. Click the pin button on an image card to choose the pin scope:
| Symbol | Scope | Effect |
| ------ | ------------------------- | ---------------------------------------------------------------------------------------------------------------------- |
| ◇ | **Pin in this panel** | Freezes only this card's run inside this image widget. Other widgets for the same run still follow the global stepper. |
| ◈ | **Pin across all panels** | Freezes this run at the chosen step in every image widget on the page that shows it. |
| ★ | **Pin to best step** | Pinned by a column-header action (see below). The step is computed per run from a metric's argmin/argmax. |
 #### Unpinning
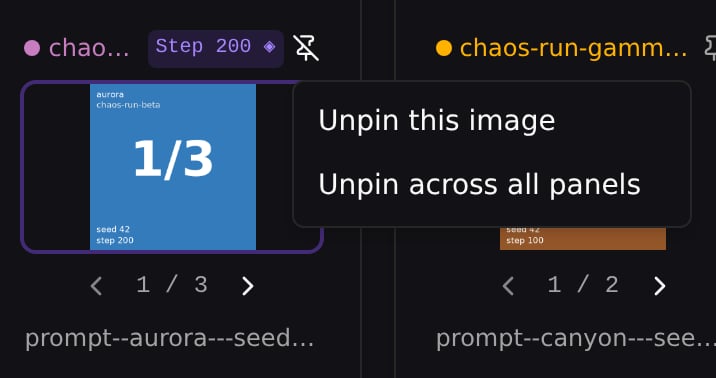
Cross-panel and best-step pins offer two unpin options in a dropdown:
* **Unpin this image** — removes the pin only from this widget. Other widgets that still hold the same cross-panel pin keep it.
* **Unpin across all panels** — removes the pin everywhere it was applied.
Local (single-panel) pins keep the simpler one-click unpin action — there's nothing else to scope.
#### Unpinning
Cross-panel and best-step pins offer two unpin options in a dropdown:
* **Unpin this image** — removes the pin only from this widget. Other widgets that still hold the same cross-panel pin keep it.
* **Unpin across all panels** — removes the pin everywhere it was applied.
Local (single-panel) pins keep the simpler one-click unpin action — there's nothing else to scope.
 #### Clear All Pins
Open the **Image Settings** popover and click **Clear All Pins** to remove every pin (local, cross-panel, and best-step) at once for the current page.
### Best-Step Pinning
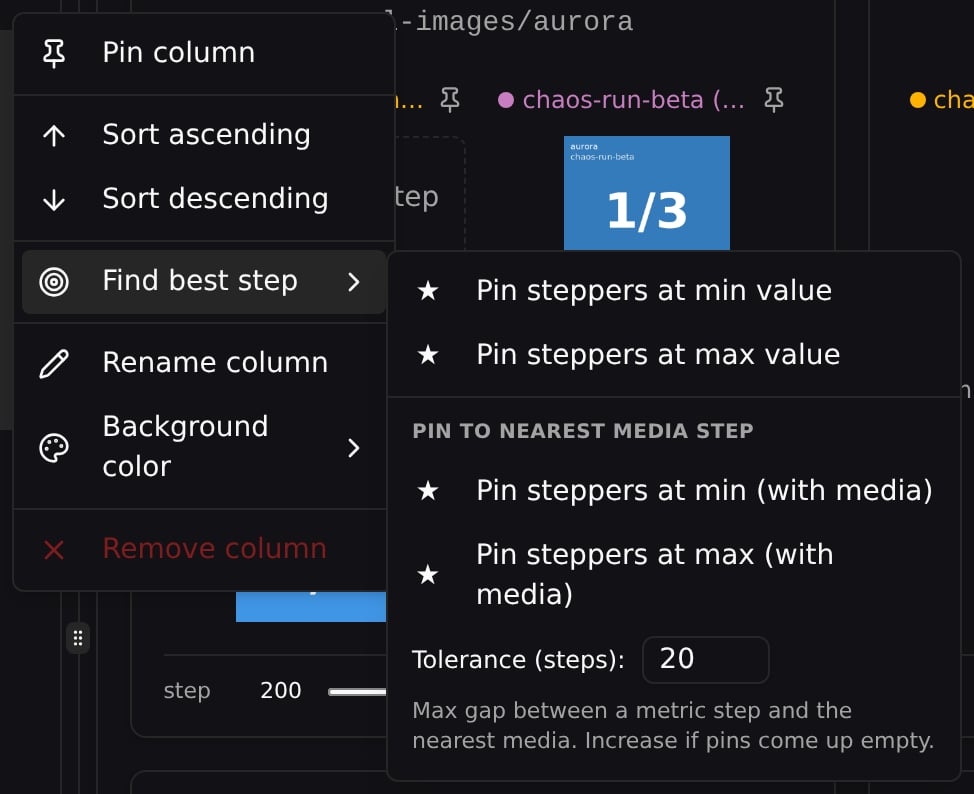
For metric-driven exploration (ex. "show me each run at its best loss"), pin every run on the page to its own argmin/argmax step in one click. Open a metric column's header menu in the runs table, then choose **Find best step** → one of:
| Action | What it pins to |
| ------------------------------------ | ----------------------------------------------------------------------- |
| **Pin steppers at min value** | Each run pinned at the step where the metric is lowest |
| **Pin steppers at max value** | Each run pinned at the step where the metric is highest |
| **Pin steppers at min (with media)** | Lowest metric value among steps that *also* have an image for that run |
| **Pin steppers at max (with media)** | Highest metric value among steps that *also* have an image for that run |
The **(with media)** variants (grouped under *Pin to nearest media step*) are useful when your metric and image cadences don't perfectly overlap — without them, the chosen step might land on a step that has no image, so the card falls back to the **No image at step N** placeholder.
#### Clear All Pins
Open the **Image Settings** popover and click **Clear All Pins** to remove every pin (local, cross-panel, and best-step) at once for the current page.
### Best-Step Pinning
For metric-driven exploration (ex. "show me each run at its best loss"), pin every run on the page to its own argmin/argmax step in one click. Open a metric column's header menu in the runs table, then choose **Find best step** → one of:
| Action | What it pins to |
| ------------------------------------ | ----------------------------------------------------------------------- |
| **Pin steppers at min value** | Each run pinned at the step where the metric is lowest |
| **Pin steppers at max value** | Each run pinned at the step where the metric is highest |
| **Pin steppers at min (with media)** | Lowest metric value among steps that *also* have an image for that run |
| **Pin steppers at max (with media)** | Highest metric value among steps that *also* have an image for that run |
The **(with media)** variants (grouped under *Pin to nearest media step*) are useful when your metric and image cadences don't perfectly overlap — without them, the chosen step might land on a step that has no image, so the card falls back to the **No image at step N** placeholder.
 #### Tolerance Window
Even with the **(with media)** variants, your metric and image cadences may not align exactly (e.g. metric every 10 steps, images every 10 steps offset by 5). The best-step picker handles this with a **nearest-snap with tolerance**: each metric step snaps to its closest image step within a step-distance limit `K` (default `K = 20`).
You can edit `K` directly in the **Find best step** submenu — type a value, press Enter or click any of the four pin buttons.
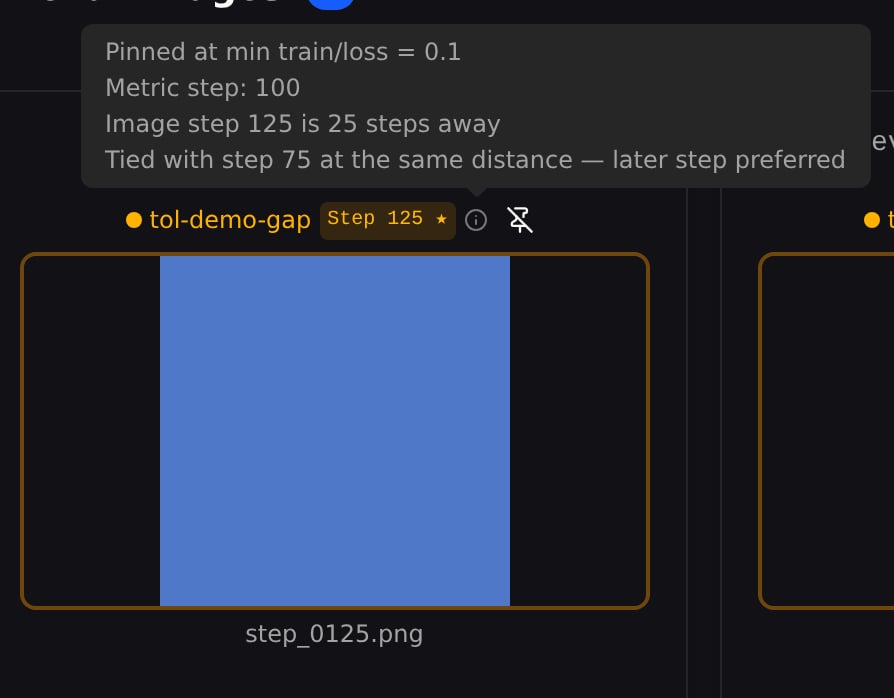
**Widen the window if pins come up empty.** In the `tol-demo-gap` run below, the metric is logged at steps 0/50/100/150/200 and images only at 25/75/125/175, so every metric step sits exactly 25 steps from the nearest image. At the default `K = 20` nothing is within tolerance and the run stays **unpinned** (plain pin icon, no step badge); raise `K` to 25 and the min-loss step (100) snaps to image step 125 — the provenance even notes the tie with step 75, broken toward the later step.
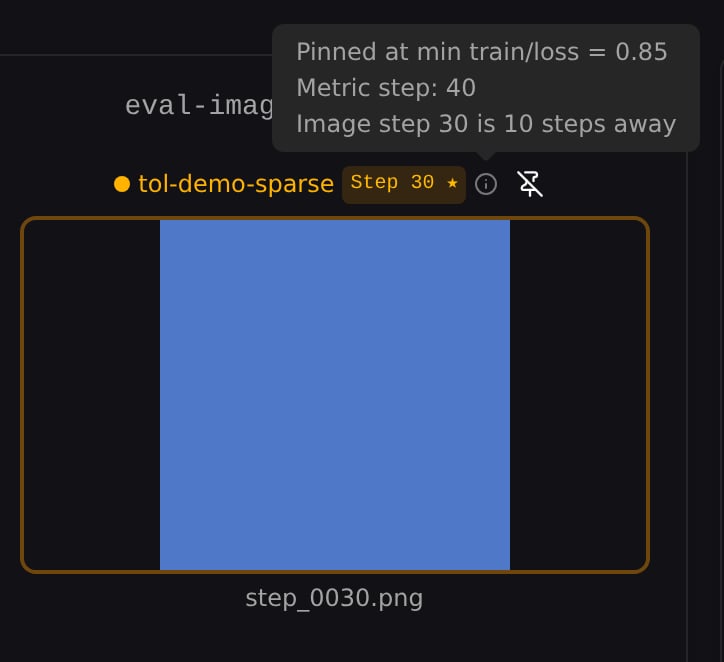
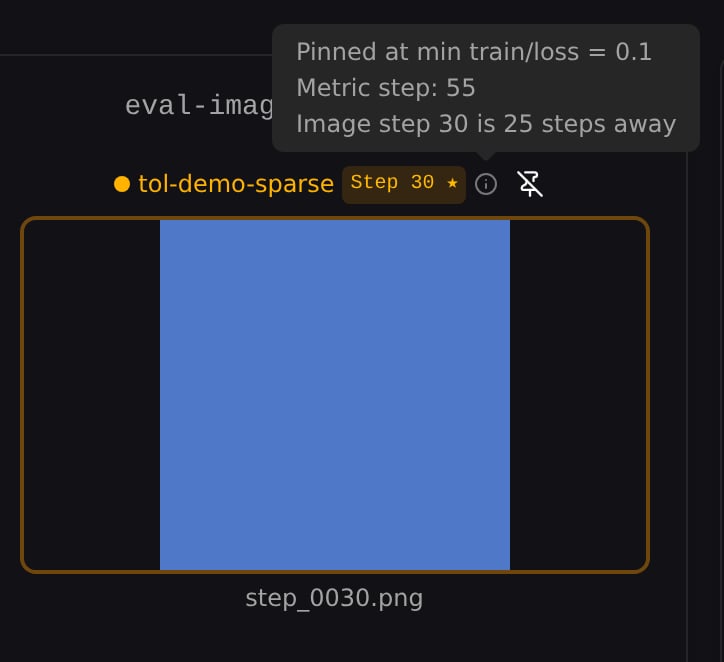
**A wider window can also find a *better* step.** When the metric keeps improving past the nearest media step, a tight window snaps to a worse value. In `tol-demo-sparse` below, `K = 10` only reaches metric step 40 (loss 0.85), while `K = 25` reaches metric step 55 — the true minimum (loss 0.1). The pinned image is the same in both (step 30); only the provenance popover reveals which metric step drove the pick.
#### Pin Provenance
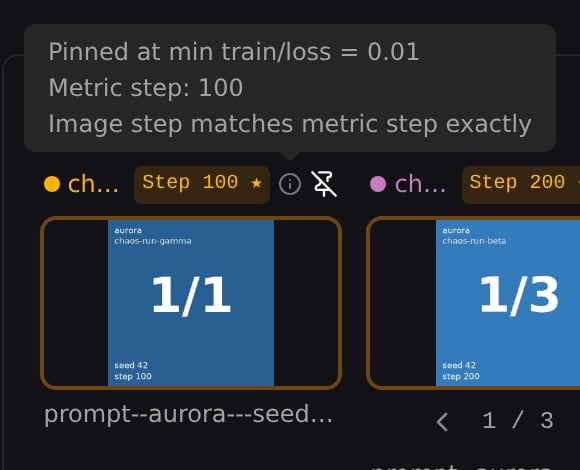
Every best-step pinned card shows an **info icon (ⓘ)** next to the run name. Hover for a popover that explains why this step was chosen:
* A headline with the metric and extreme that drove the pick (e.g. *Pinned at max train/loss = 0.9023*)
* The metric step that drove the pick
* How many steps away the chosen image is from that metric step
* A tied-alternative line when more than one image step matched within tolerance
#### Tolerance Window
Even with the **(with media)** variants, your metric and image cadences may not align exactly (e.g. metric every 10 steps, images every 10 steps offset by 5). The best-step picker handles this with a **nearest-snap with tolerance**: each metric step snaps to its closest image step within a step-distance limit `K` (default `K = 20`).
You can edit `K` directly in the **Find best step** submenu — type a value, press Enter or click any of the four pin buttons.
**Widen the window if pins come up empty.** In the `tol-demo-gap` run below, the metric is logged at steps 0/50/100/150/200 and images only at 25/75/125/175, so every metric step sits exactly 25 steps from the nearest image. At the default `K = 20` nothing is within tolerance and the run stays **unpinned** (plain pin icon, no step badge); raise `K` to 25 and the min-loss step (100) snaps to image step 125 — the provenance even notes the tie with step 75, broken toward the later step.
**A wider window can also find a *better* step.** When the metric keeps improving past the nearest media step, a tight window snaps to a worse value. In `tol-demo-sparse` below, `K = 10` only reaches metric step 40 (loss 0.85), while `K = 25` reaches metric step 55 — the true minimum (loss 0.1). The pinned image is the same in both (step 30); only the provenance popover reveals which metric step drove the pick.
#### Pin Provenance
Every best-step pinned card shows an **info icon (ⓘ)** next to the run name. Hover for a popover that explains why this step was chosen:
* A headline with the metric and extreme that drove the pick (e.g. *Pinned at max train/loss = 0.9023*)
* The metric step that drove the pick
* How many steps away the chosen image is from that metric step
* A tied-alternative line when more than one image step matched within tolerance
 ### Sync Zoom
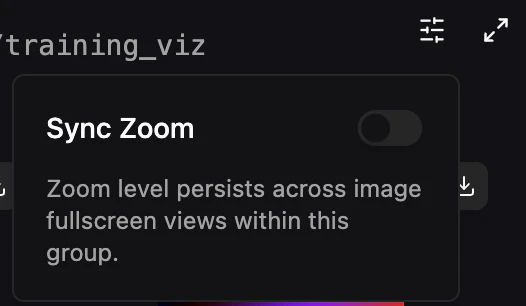
Click the **settings** icon on an image card to open the Image Settings popover. Enable **Sync Zoom** to persist the zoom level across image fullscreen views within the same group. When enabled, zooming in on one image carries over when you navigate to the next step. Sync Zoom is off by default.
### Sync Zoom
Click the **settings** icon on an image card to open the Image Settings popover. Enable **Sync Zoom** to persist the zoom level across image fullscreen views within the same group. When enabled, zooming in on one image carries over when you navigate to the next step. Sync Zoom is off by default.